Audience: All users in Logicbroker.
In this article, you will find information related to Bulk Actions - users can perform actions in bulk to process orders, download attachments or reprocess failed documents. The sections within this article are outlined below:
Note:
Bulk actions do not support some options that may be available on individual order creation/processing such as scheduled ship dates, multiple boxes/tracking numbers etc. For more information on actions available on individual documents see our document articles found in the Order Management section.
Document Selection
1. Set filters– depending on which documents you want to perform an action on, you may need to set filter(s). Common filters include document types (order, shipment, etc.) and document status (Ready to ship, Ready to invoice, Failed, etc.) You can select more specific filters using the Filter results
2. Select documents– Once you see the documents you want to work on in your Orders page, select the specific ones you want to act on. To do so, click the box for individual documents or click the select all box in the top. Please note: clicking select all will only select the documents visible on the page. You can increase the rows per page to select more, but you cannot select from multiple pages. To export all documents, use our Advanced Export tool.
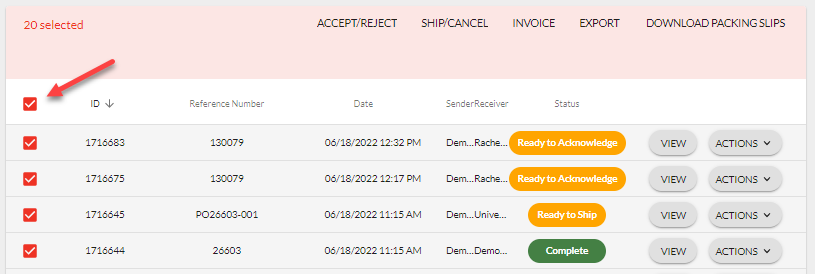
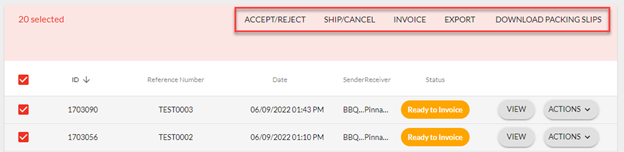
3. Select action – based on the types of documents you selected, a list of actions will appear. For example, the Accept/Reject action will only appear on orders.
Accept/Reject
This option is only available on Orders - this action allows you to create an acknowledgment for orders to either accept, cancel or backorder items. You can acknowledge orders in Ready to Acknowledge or Ready to Ship status. Make sure you review your retailer's documentation and the Document Standards tab in the portal to know what fields are required. For more information on retailer document requirements, see our Document Standards article and for more information on acknowledgments including fields, settings and instructions on individual document creation, see our Acknowledgments article.
Instructions
1. Select the orders you want to accept or reject
2. Click on Accept/Reject
3.
Go through each order and fill out the following fields:
4.
Submit and review the acknowledgment ID that has been created or click on
Submit All at the bottom of the page

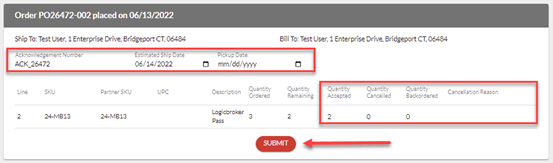
Accept/Reject Fields
Acknowledgment Number – the reference number assigned to the document. Logicbroker will default this field using the format: ACK_PO# For example, if the PO is 123, the acknowledgment number will be ACK_123) but you can change it to anything you want. Please note: every acknwoledgment must have a unique ID
Estimated Ship Date / Pickup Date – the date the order will be shipped out or pickup up. Select the date from the calendar tool or type in the date using the provided format. Please note: this is usually for freight/LTL shipments
Quantity Accepted – the number of items on that line that you are accepting and plan on shipping out Please note: all line items are accepted by default
Quantity Cancelled – the number of items on that line that you are cancelling and not shipping out
Quantity Backordered - the number of items you are placing on backorder meaning you cannot ship them now but plan on shipping at a later date once those items are in-stock
Change/Cancellation Reason - the reason why you are cancelling items. Make sure you know which cancel codes are accepted by your partner prior to cancelling items. Please note: Logicbroker maps to retailer’s accepted cancel codes so your retailer’s specific code may not match what is in the dropdown. For example, a retailer may accept a code of OS to mean out of stock – in this case, Logicbroker will map our code to the retailer’s code so that when the supplier select the code Out of Stock from the dropdown, we will send it to the retailer as their accepted OS
Ship/Cancel
This option is only available on Orders - this action allows you to create an acknowledgment or a shipment for orders to either ship or cancel items. You can cancel or ship orders in Ready to Acknowledge or Ready to Ship status. Make sure you review your retailer's documentation and the Document Standards tab in the portal to know what fields are required. For more information on retailer document requirements, see our Document Standards article and for more information on acknowledgments and shipment including fields, settings and instructions on individual document creation, see our Acknowledgments and Shipments article.
Instructions
1. Select the orders you want to ship or cancel
2. Click on Ship/Cancel
3.
Go through each order and fill out the following fields:
4.
Submit each document individually or click on
Submit All at the bottom of the page. Review the acknowledgment or shipment ID that has been created


Please note: The Submit All button is only available on the Ship/Cancel action.
Instructions using a Merchant account
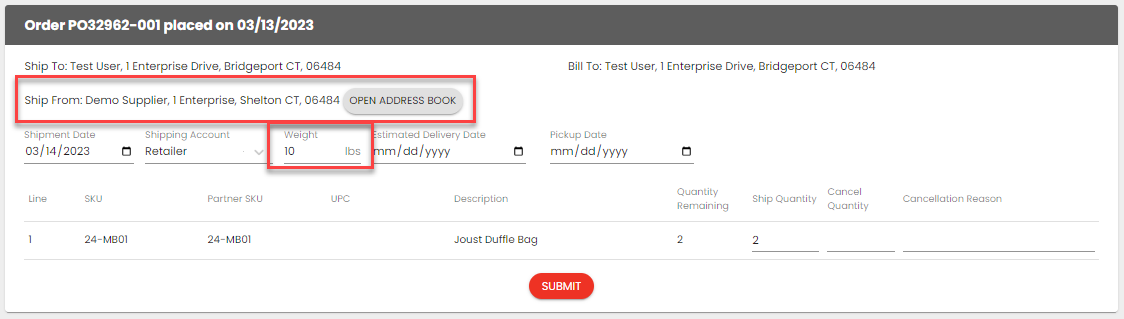
Suppliers who are connected to their shipping integration (such as ShipEngine) or are working with a retailer that supports supplier using their shipping integrator can use this functionality when bulk shipping orders. The only required information needed to ship using a merchant account is:
-
- Ship From Address - this can be defaulted, see Document Settings > Ship From Addresses for setup instructions
- Weight - if this is available on the order, we will default it on the shipment - if not, it will have to be input manually
1. Select the orders you want to ship
2. Click on Ship/Cancel
3.
Go through each order and select the
Shipping Account - if you are using your retailer's shipping account, select
Retailer
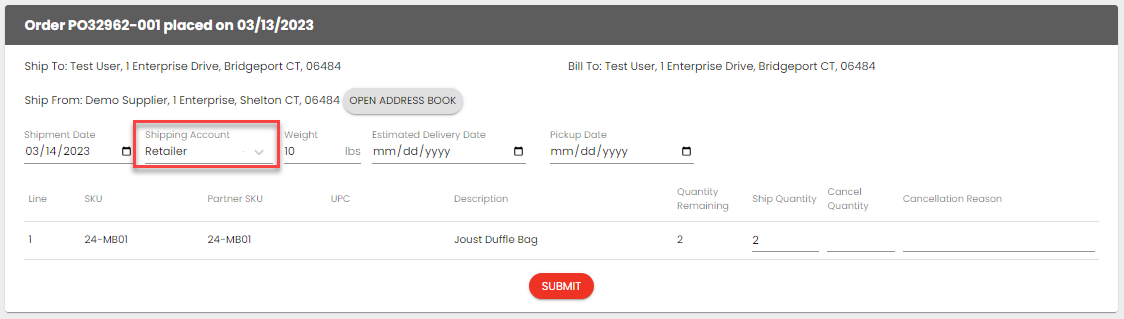
4. Make sure the
Ship From Address is correct. Enter in the
Weight if it is not pre-populated
5.
Submit each document individually or click on
Submit All at the bottom of the page. Review the shipment ID that has been created
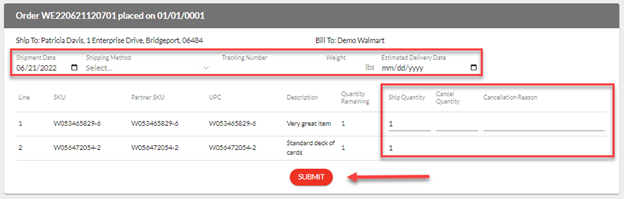
Ship/Cancel Fields
Shipment Date – the date you plan on shipping the order. Select the date from the calendar tool or type in the date using the provided format.
Shipping Method – method you are using to ship the order
Tracking Number – a valid tracking number
Weight – the weight of the box
Estimated Delivery Date - the date you plan on this order being delivered. This is just an estimated date, so no need to be exact. Select the date from the calendar tool or type in the date using the provided format
Pickup Date - the date the order is being picked up instead of shipped out. Normally this is for larger LTL or freight orders. Select the date from the calendar tool or type in the date using the provided format
Ship Quantity – the number of items on that line that you are shipping
Cancel Quantity – the number of items on that line that you are cancelling and not shipping out
Change/Cancellation Reason – the reason why you are cancelling items. Make sure you know which cancel codes are accepted by your partner prior to cancelling items. Please note: Logicbroker maps to retailer’s accepted cancel codes so your retailer’s specific code may not match what is in the dropdown. For example, a retailer may accept a code of OS to mean out of stock – in this case, Logicbroker will map our code to the retailer’s code so that when the supplier select the code Out of Stock from the dropdown, we will send it to the retailer as their accepted OS
Other fields – depending on partner specifications, you may see additional fields on this page such as weight, destination information, etc. See partner-specific documentation if you have questions on how to bulk ship/cancel documents with their specific fields.
Invoice
This option is only available on Orders and Shipments - this action allows you to create an invoice for all shipped items. You can invoice orders that have already been shipped and are in a Ready to Invoice status. It is recommended to invoice off shipments instead of orders that way you can be certain you are only invoicing shipped items. Make sure you review your retailer's documentation and the Document Standards tab in the portal to know what fields are required. For more information on retailer document requirements, see our Document Standards article and for more information on invoices including fields, settings and instructions on individual document creation, see our Invoices article.
Instructions
1. Select the orders you want to invoice
2. Click on Invoice
3.
Go through each order and fill out the following fields:
4.
Submit and review the invoice ID that has been created or click on
Submit All at the bottom of the page

Please note: Creating invoices for orders that have not been shipped will cause invoices to fail.
Invoice Fields
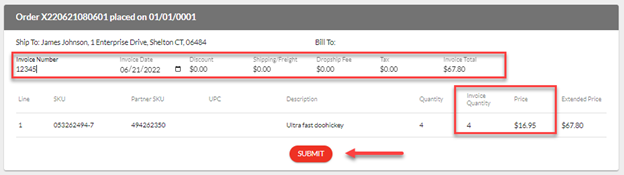
*Invoice Number – the reference number assigned to this document - this is the only required field
Invoice Date – the date you want to invoice the order. Select the date from the calendar tool or type in the date using the provided format.
Discount – any discounts you are applying to the order
Shipping/Freight – any shipping or freight fees you want to apply to the order
Dropship Fee – any fees associated with dropshipping the order
Tax – any taxes you want to apply to the order
Invoice Total – this should automatically be calculated based on the inputs above but can be adjused it if needed
Invoice Quantity – the number of items per line you are invoicing. This will be defaulted to equal the order quantity but you can adjust as needed
Price – the price per item you are charging the retailer
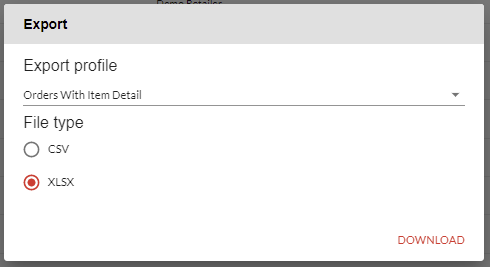
Export
This option is available on all document types - this action allows you to export document information in a CSV or XLSX format. For more information on our Advanced Export tool including profiles, formats, filters, fields and instructions, see our Advanced Export article.
Instructions
1. Select the orders you want to export
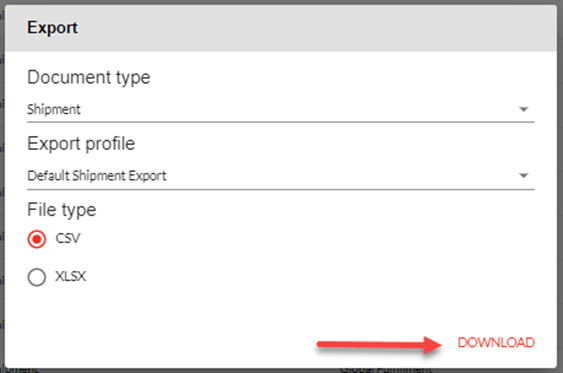
2. Click on Export
3. Select the Document Type Please note: this option is only available for certain document types
4. Select the Export profile – this is the profile we will use to run the export. Please note: to review what fields are exported on a specific profile, in the portal go to Files > Advanced Export > Profiles > review the Document Filters and Fields to Export
5. Select the File type you want to use for the export
6. Click
Download
Please note: Only selected documents will be exported. To increase the selection, you can increase the Rows per Page in the bottom right of the screen. To export more documents than on the page, use the Advanced Export function
Import Tracking
This option is only available on Orders - this action allows you to import tracking information for open orders by automatically creating Shipments (ASNs) using a spreadsheet (Excel or CSV format). Make sure you review your retailer's documentation and the Document Standards tab in the portal to know what fields are required. For more information on retailer document requirements, see our Document Standards article and for more information on our Advanced Import tool including profiles, formats, filters, fields and instructions, see our Advanced Import article.
Instructions
1. Select the orders you want to import tracking for
2. Click on Export
3.
Select the Export Profile
-
- Orders With Item Detail - this option allows you to mark items as shipped on a line level *recommended
- Orders Without Item Detail - this option marks items as shipped on an order level
4. Select the File Type *XLSX is recommended
5. Click
Download
6. Once you export your list of orders, open up the file and fill out the following fields:
-
- TrackingNumber
- CarrierCode
- ShipFromAddress.CompanyName
- ShipFromAddress.Address1
- ShipFromAddress.Address2
- ShipFromAddress.City
- ShipFromAddress.State
- ShipFromAddress.Zip
- ShipFromAddress.Country
- QuantityShipped
Please note: The key identifier that links to your orders will be the ID column. This is the ID of the document in Logicbroker.
7. Save the file
8.
From the Orders page, click on Import Tracking
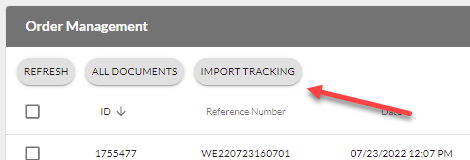
9. Select and upload your file
10.
Once uploaded, the results will display with all successful and failed documents processed. If you have the Tracking Upload Failed notification turned on, you will receive an email as well.
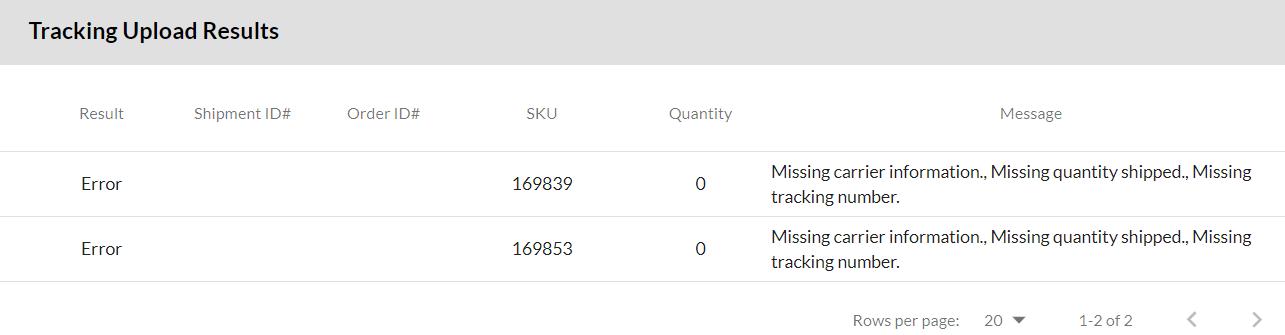
11. Fix and errors as needed and reupload
Please note: Some retailers have a custom shipment format that does not work with this feature. This feature is for retailers and suppliers that are using our standard templates. If you are unable to use the Import Tracking feature, please contact Logicbroker Support for additional details on alternative ways to import tracking via the portal.
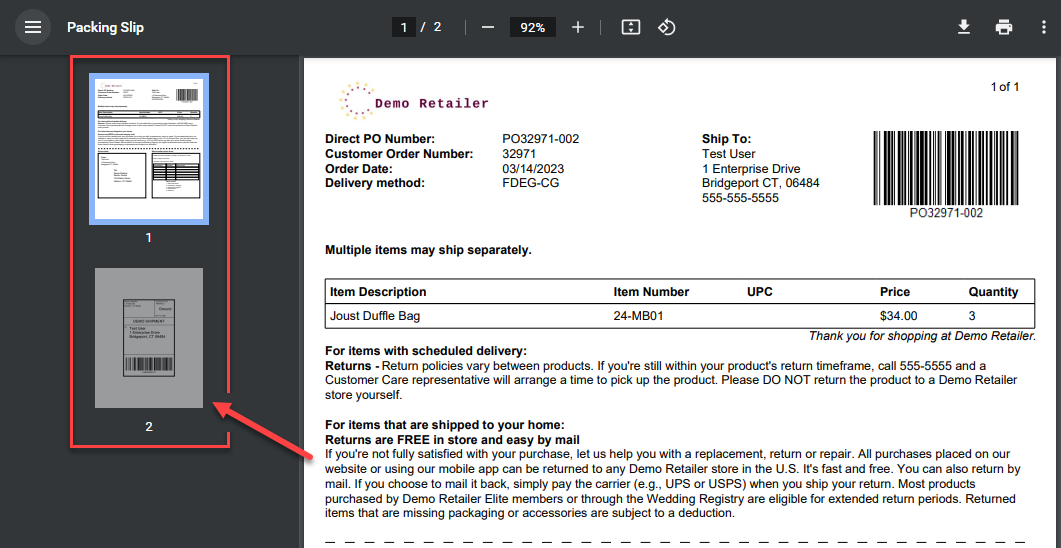
Download Packing Slips
This option is available on complete Orders and Shipments - this action allows you to download a PDF of the packing slips for all selected orders for review or to print on an order or line level. These will be downloaded by how they were received, so if we receive order A, order C, and order B (in that order) the packing slip will appear in that same order. This is also true for the API endpoints.
Order Level
Downloading packing slips in bulk off orders will reflect
order level information meaning that all order items will show regardless of shipping status. For more information on downloading packing slips on individual orders, see the
Download Packing Slips section of our
Orders article.
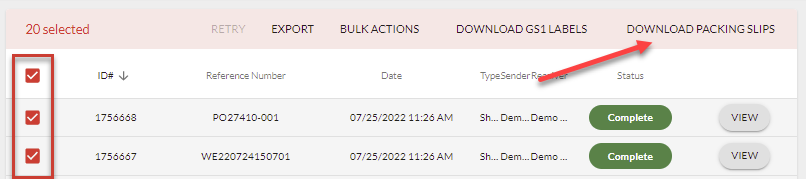
1. Select the orders you want to download a packing slip for
2. Click on
Download Packing Slip
Shipment Level
Downloading packing slips in bulk off shipments will reflect
line level information meaning that just the items on a specific shipment. For more information on downloading packing slips on individual shipments, see our
Shipments article.
1.
Click on All Documents
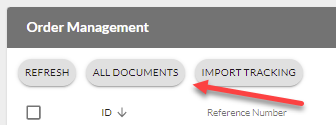
2.
Filter Type for Shipment - see our Orders Page > Display article for instructions on how to filter results 3. Select the orders you want to download a packing slip for
4. Click on Download Packing Slip
Download GS1 Labels
This option is available on Shipments - this action allows you to download a PDF of the GS1 Labels for all selected shipments for review or to print. These will be sorted by shipment and then by container code. Please note: before downloading GS1 labels, make sure you have configured your UCC 128 Company ID. For more information on setting up your UCC 128 Company ID, see our Document Settings article and for more information on downloading GS1 labels on individual shipments, see our Shipments article.
Instructions
1. Select the shipments you want to download a GS1 Label for
2. Click on
Download GS1 Labels

Download Shipping Labels
Please note: Only for suppliers using a shipping integrator such as ShipEngine or working with a retailer that is using a shipping integrator.
This option is available on complete Shipments - this action allows you to download a PDF of the shipping labels for all selected shipments for review or to print.
Instructions
1. Select the shipments you want to download a shipping label for
2. Click on
Download Packing Slips
3.
Select the format > click Download
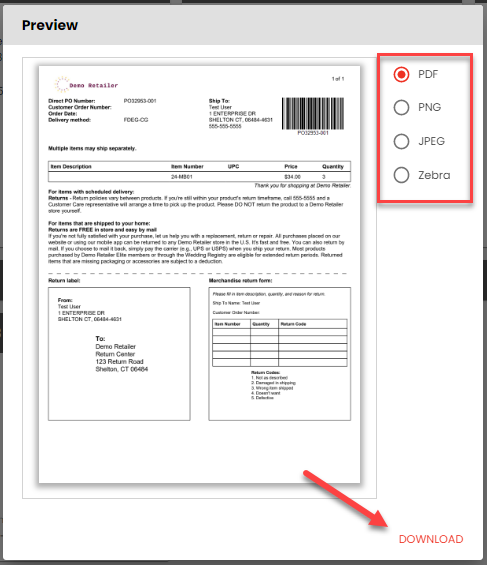
4.
On the download you will see the packing slip on the first page and the shipping label on the second page
Retry
This option is available on documents in a Failed status - this action sets the status of documents back to New and allows them to flow through the normal status flow once more. Do this if the documents failed due to a time-out error or if new logic has been put in place to fix previous errors. If a document continues to fail, this indicates there may be something wrong with that document. Click on View > Most recent event to troubleshoot and resolve the error.
Instructions
1. Select the documents you want to reprocess
2. Click on
Retry

Comments
Please sign in to leave a comment.