Logicbroker's Commerce EDI bundle for NetSuite allows suppliers to integrate Logicbroker's services with their NetSuite transactions to facilitate a connection with retailers and third party shipping systems. This bundle handles:
- Pulling orders from Logicbroker into NetSuite as Sales Orders
- Sending NetSuite Item Fulfillment transactions to Logicbroker, who can then distribute it as an order to a third party shipping connection
- Pulling shipments from Logicbroker into NetSuite as Item Fulfillments
- Sending PO Acknowledgements/cancellations from NetSuite out to retailers
- Sending NetSuite Invoice transactions to Logicbroker
- Pulling cancellation requests from retailers into NetSuite and cancelling the corresponding Sales Order lines
- Pulling cancellations from the third party shipping system into NetSuite in the form of Fulfillment Request exceptions
- Broadcasting NetSuite inventory to retailers via Logicbroker's Broadcast API endpoint
- Sending inventory updates from NetSuite on a per-partner basis
It also features a saved search, "Logicbroker Failed Exports", which allows users to conveniently view all documents that have failed to export to Logicbroker.
Installation
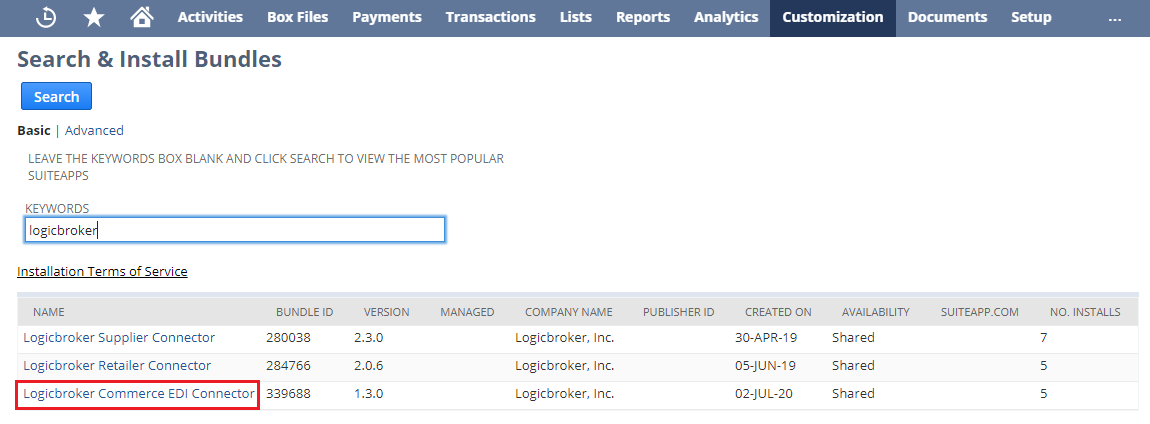
In NetSuite, navigate to Customization > SuiteBundler > Search & Install Bundles. Search for “Logicbroker” and select the “Logicbroker Commerce EDI Connector” SuiteApp bundle.
Note:
You will need either Administrator privileges or the SuiteApp Marketplace permission (formerly SuiteBundler permission) in order to access this screen in NetSuite.
On the bundle’s page, click the install button to install it on your NetSuite instance.
Configuration
Once the bundle has been installed, navigate to Setup > Company > Preferences > General Preferences. Scrolling down, select the Custom Preferences tab. There will now be a section labeled “Logicbroker Commerce EDI Connector”.
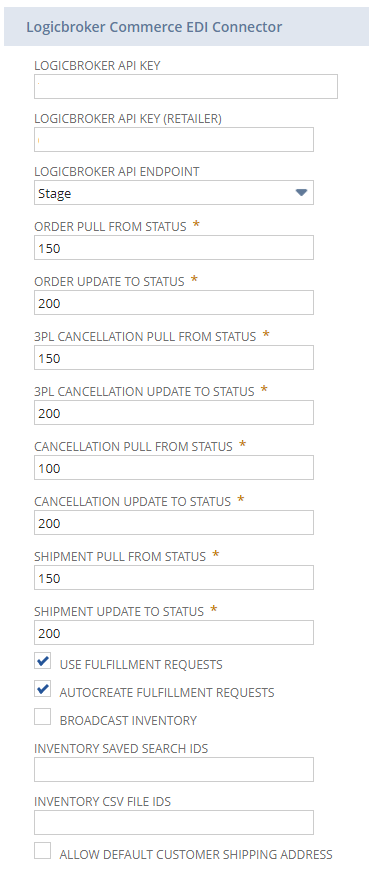
The Logicbroker customer will have 2 Logicbroker accounts: their main supplier account, which receives orders from retailers and sends shipments out, and a second company to send orders to third party shipping systems and receive shipment confirmations back. Both accounts will be assigned API keys, which can be found in the portal under API Authentication. Enter the API keys and select which endpoint to use.
You can also configure what Logicbroker statuses the documents should pull from and update to.
Most customers using this bundle will be using Fulfillment Requests. Be sure to check that box if your integration will use them.
If desired, the bundle can autocreate Fulfillment Requests immediately after pulling a Sales Order into NetSuite. This option is only available if no approval process is implemented for the Sales Order. If there is no inventory location set on an item, the bundle can use the default location configured. To use this feature, check the corresponding checkbox.
If your company uses a saved search or CSV file (or multiple) for inventory instead of the native NetSuite inventory functionality, you have the option of broadcasting them to all partners in Logicbroker, or configuring them on a per-partner basis. If you wish to broadcast them, check the Broadcast Inventory checkbox and add the search IDs as a comma-separated list in the Inventory Saved Search IDs field, and any CSV internal file IDs in the Inventory CSV File IDs field. We will expect the files to be overwritten any time they are updated, keeping the internal file ID constant. Configuration details for sending inventory per-partner can be found later in this article.
Note:
There are separate API keys associated with your Stage (stageportal.logicbroker.com) vs Production (portal.logicbroker.com) so you will need to log into both to generate the key, if there is no key currently generated. Also be sure to match the API key with the proper API endpoint based on environment.
Tip:
We recommend you start out with your staging environment. Once you've tested everything in the staging environment, switching over to production is as easy as using your production API key and changing the API endpoint to "Production".
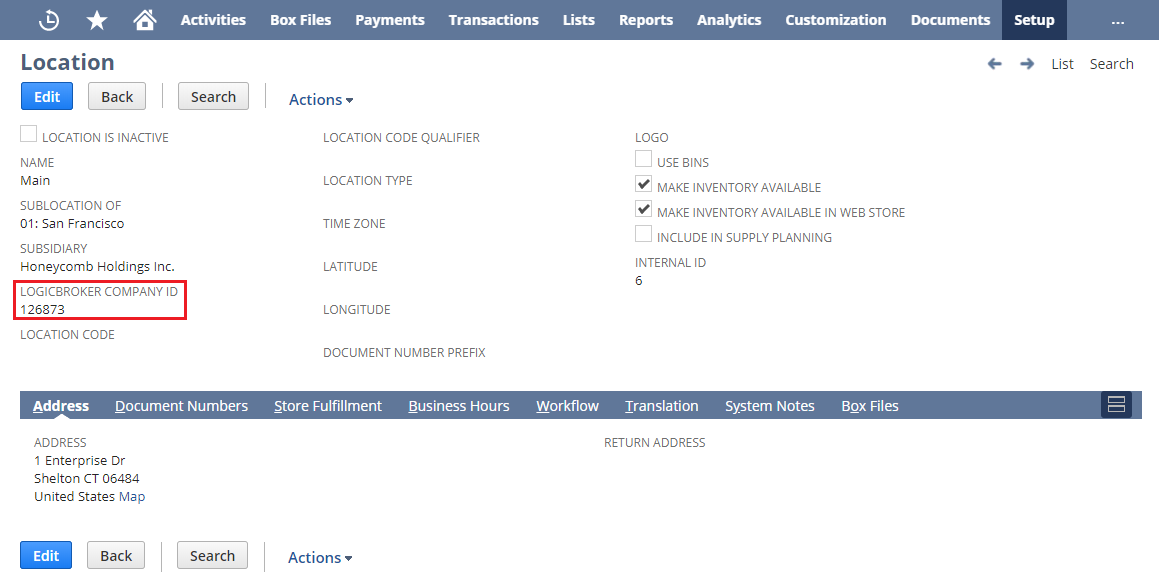
In order for Logicbroker to determine where to route Fulfillment Requests, the corresponding Logicbroker Company ID must be set on any Location records that will be involved.
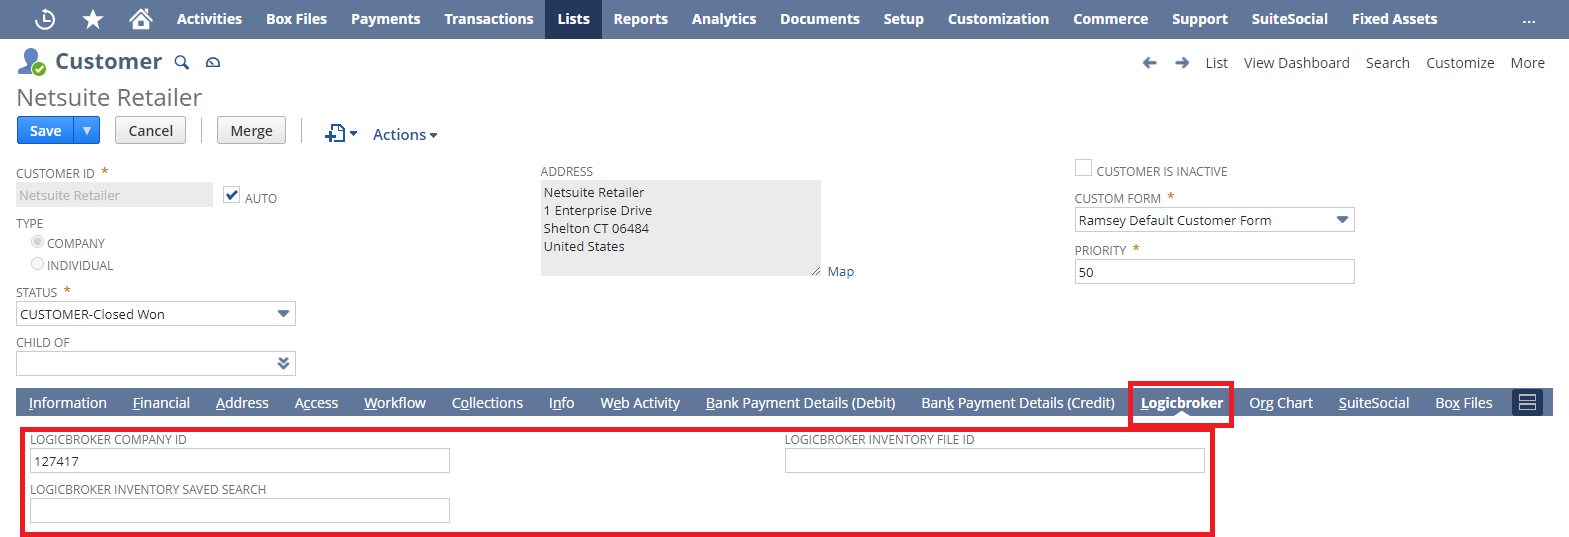
In addition, you must set up all NetSuite customers with their corresponding Logicbroker Company ID, found on the Logicbroker tab of the Customer record. This is also where you would enter a Saved Search ID or CSV file ID to send inventory by partner, as explained below.
Sending Inventory from NetSuite by Partner
If you wish to send different Saved Search inventory to various partners, uncheck the Broadcast Inventory checkbox in the general bundle configuration. This renders the Inventory Saved Search IDs on the company preferences level unused.
Then, for every partner you wish to send inventory to, navigate to their Customer record in NetSuite. Under the Logicbroker tab, add the search IDs or file IDs that should be exported to that partner.
Map/Reduce SuiteScripts Usage
Under Customization > Scripting > Script Deployments, locate the Logicbroker Commerce EDI Connector entries. Their IDs will all begin with “customdeploy_lb3pl_”.
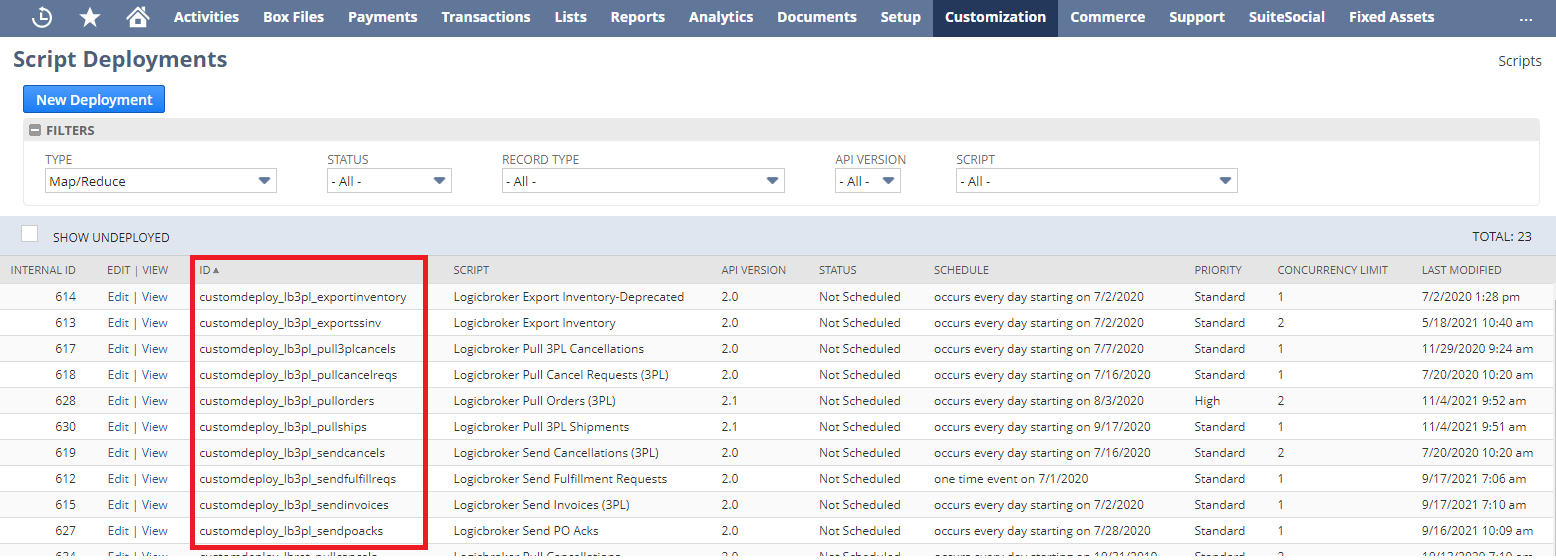
Note that there are multiple inventory-related script deployments. If you have configured saved searches or CSV files to be sent to Logicbroker, the Logicbroker Export Inventory deployment should be used. This is usually the case. Our inventory script can handle any combination of file IDs and Saved Searches, sent either by partner or broadcast.
If you are using native NetSuite inventory functionality, the Logicbroker Export Inventory-Deprecated should be used.
For each of the script deployments, select Edit. You should see the following screen:
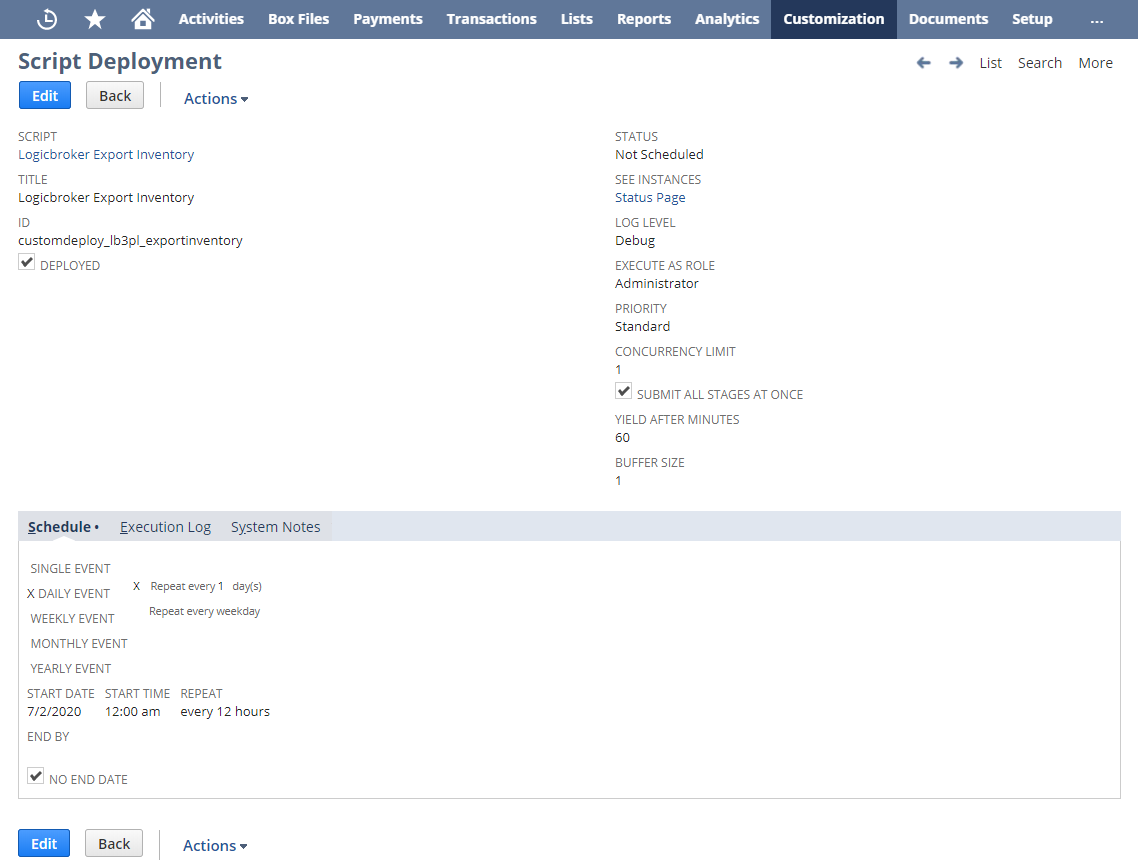
For testing:
To run a script for testing purposes (not scheduled), leave the Status as “Not Scheduled” and select the arrow next to the Save button to choose “Save and Execute”.
For scheduling:
To schedule the script, change the Status to “Scheduled” and adjust the Schedule tab to suit your needs and control how often the script will run. Then click Save.
Comments
Please sign in to leave a comment.