Upload the cartridge
Using your preferred method, upload the int_logicbroker cartridge to your server. If you have Eclipse connected to your server, then the easiest way is to import the int_logicbroker folder into your UX Studio workspace (File > Import > General > Existing Projects into Workspace) and attach it to your Digital Server.
Add cartridge to site path
For every site that you want to connect, navigate to Administration > Sites > Manage Sites, select the site, and under Settings, add “:int_logicbroker” to the end of the cartridge path. Click Apply to save your changes.

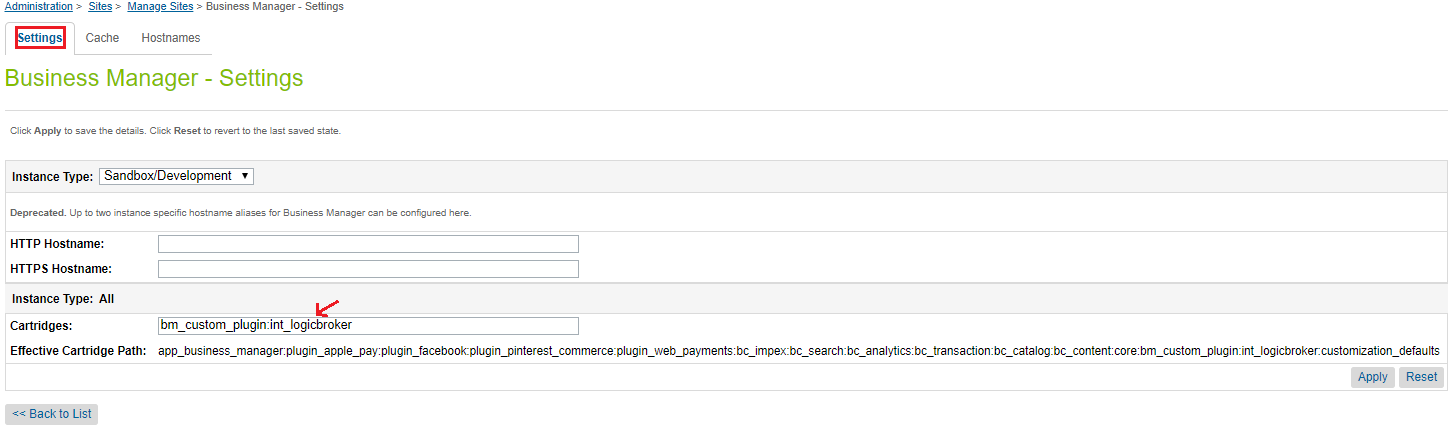
Add cartridge to Business Manager path
For every site that you want to connect, navigate to Administration > Sites > Manage Sites. Under Business Manager Site, select “Manage the Business Manager site”. Under Settings, add “:int_logicbroker” to the end of the path. Click Apply to save your changes.
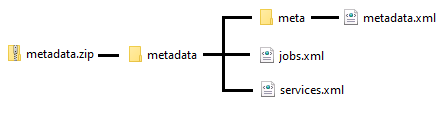
Import metadata
Navigate to the metadata folder of the cartridge and zip it. The file structure should be as follows:
In Business Manager, navigate to Administration > Site Development > Site Import & Export.
Under Import, select Choose File and upload metadata.zip. Click to upload the file.
Then below, select the newly uploaded metadata.zip file and click Import. Confirm the import.
Comments
Please sign in to leave a comment.